
Surface treatment
Grinding
tbd
Scotch brightening
tbd
Polishing
After defining the over all shape of your workpiece by grinding you can polish it to a stage where the grinding marks aren´t visible anymore or even beyond to a mirror polish.
Important is that you have removed all unwanted dents and bumps in the planishing and/or grinding phase because they will get clearly visible in a mirror polish.
I use different types of polisching wheels on a bench grinder. My bench grinder has not really enough power but he can manage wheels with a diameter of 200mm.
In the future I will need a real bench buffer cause it can manage bigger wheels by higher rpm.

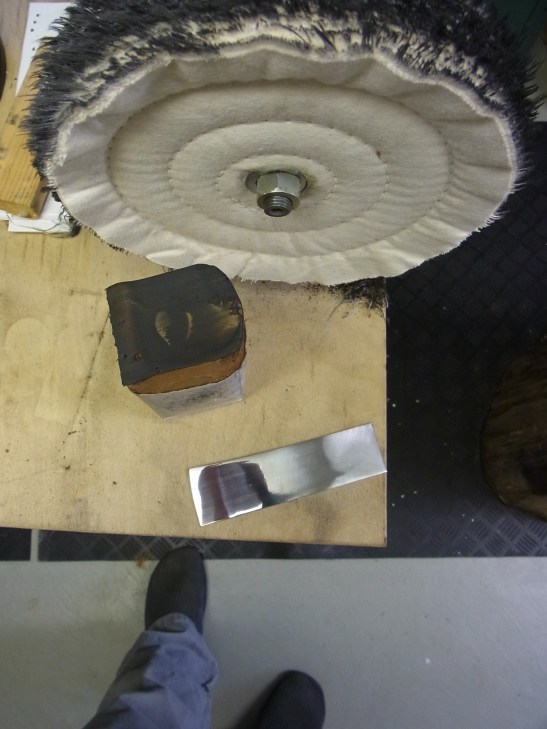
Load up a polishing wheel
I found mainly two different types of wheels. For rougher polishing I use wheels made out of sisal. For finer work I use wool.
For polishing you need then to load an polishing compound into the wheel. Important is that you need one wheel for every grain that is used. You should not mix the different grains of different polishing compounds in one wheel.
In addition you should not use a wheel for non-ferrus metals that was already used on steel. When small parts of the previously polished iron remain in the wheel they will then pushed into the surface of the non-ferrus metal and will lead to a corrosionproblem.
You will find polishing compounds for prepolishing, polishing and for buffing to be used in this order.
The polishing compound is an abrasive mixed with some sort of wax. You will get it in bar or block. To load a wheel you just have to press the compound slightly against the turning wheel. The wax will rub into the wheel.
To polish your workpiece you press and move it lightly against the turning wheel. Keep moving and hold your polishing direction till you removed all marks from the previous step.
Here is an example with aluminum. It was grindet before with a 150 grain sandpaper.
First polishing step

Second polishing step
Here you can see the result with a fine mirror polish after 15 min.

Mirrored polish
.
Blackening (fire)
When fireblackening steel you produce a thin coat of oxides on the surface that will not prevent but will suppress rust.
For fireblackening I burn oil into the clean surface by approx. 300°C in mutliple iterations. The color depends on the used oil, the temperature and the count of iterations.
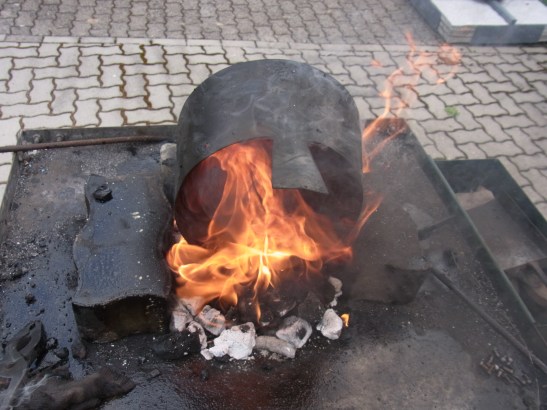
To heat the workpiece up I use a gasburner or a coalforge. Important is to hit the needed temperature exactly because otherwise when the desired 300°C is exceeded the coating will be burned and destroyed.
Before starting the blackening the surface must be free of rust, grease or other remains. These will lead to discoloured or dull spots.
You can degrease a workpiece with a spray degreaser or by boiling it in a 5% sodium hydroxide solution.
Attention: while heating up the oil will evaporate and in worst case inflamme
Blackening accident
I use an lineseed oil in which I dissolve 1/20 part of sulfure by 150°C. For this a thermometer is essential because lineseed oil have the tendency to inflame. The sulfur helps to get a deep black surface.

Mixing the blackening oil
First step for the blackening itself is to heat the workpiece slightly. The temperature should not exceed 100°-150°C because otherwise the first temper colors will show and a porper blackening is not possible anymore.
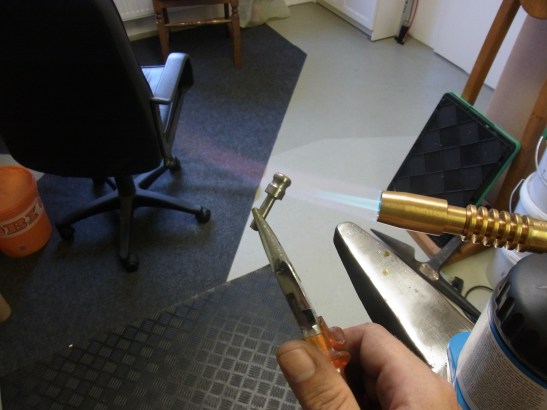
Heat up before oil application
When the workpiece is up to temperature the warm linseseed oil is applied in a thin even coating (with a brush or by dipping).
Afterwards it will be heated up further with the torch. First sign to recognize is a brown coloration.

Brown coloration
Now it will start smoke and the blackening is finished when the smoke stopped. Now the heating must be stopped because otherwise the coating will be burned.
The process can be repeated till the right color is achieved.

Smoke while blackening
After cleaning the piece the surface must be loaded again with oil or wax.

How many Watts does your bench grinder has?
I’m thinking about buying one! Is 200 Watt enough?
What do you think of belt sanders for cleaning up armour?
Thank you!!
Hi,
my bench grinder has 380 Watt and that is already not really enough. I would recommend to not choose a 200 Watt grinder.
A friend of mine uses a beltgrinder for armour. From my point a belt grinder is good to remove stock and produce defined surfaces (flat and konvex).
For armour I prefer grind- and polishing wheels so I can easy form the transitions. But for sure it is not as fast as belts are.
Best regards
Thanks! Ok i’ll try to get a bench grinder with more power (however i only have single phase)