
Chain maille signature ring
For some upcoming maille projects I wanted to make myself a signature ring. The details you can find here on this page but also you can find an overview in the linked video.
The signature rings are planned to be used in a 4in1 weave of 9mm inner diameter riveted aluminium rings. So I choose to make the signature ring with a 13mm outer and a 8mm inner diameter by 2mm thickness.
As material I will use brass and I will try to electro-etch them by protecting the brass with a photoresist and etch it in a saltsolution.
Photo-Resist
First step for the photo-resist is to make a template on a semi-transparent paper. I draw the template in inkscape as an .svg. The inscraping on the rings will be my name and the medieval name of the town i´m working in.
In the illumination of the photo resist the printed side of the paper will lay directly on the brass to avoid shadowing. This means that all letters are written on mirror-inverted.
I will use a photo-negativ resist. So the illuminated areas on the photoresist will remain and will protect the workpiece while etching.
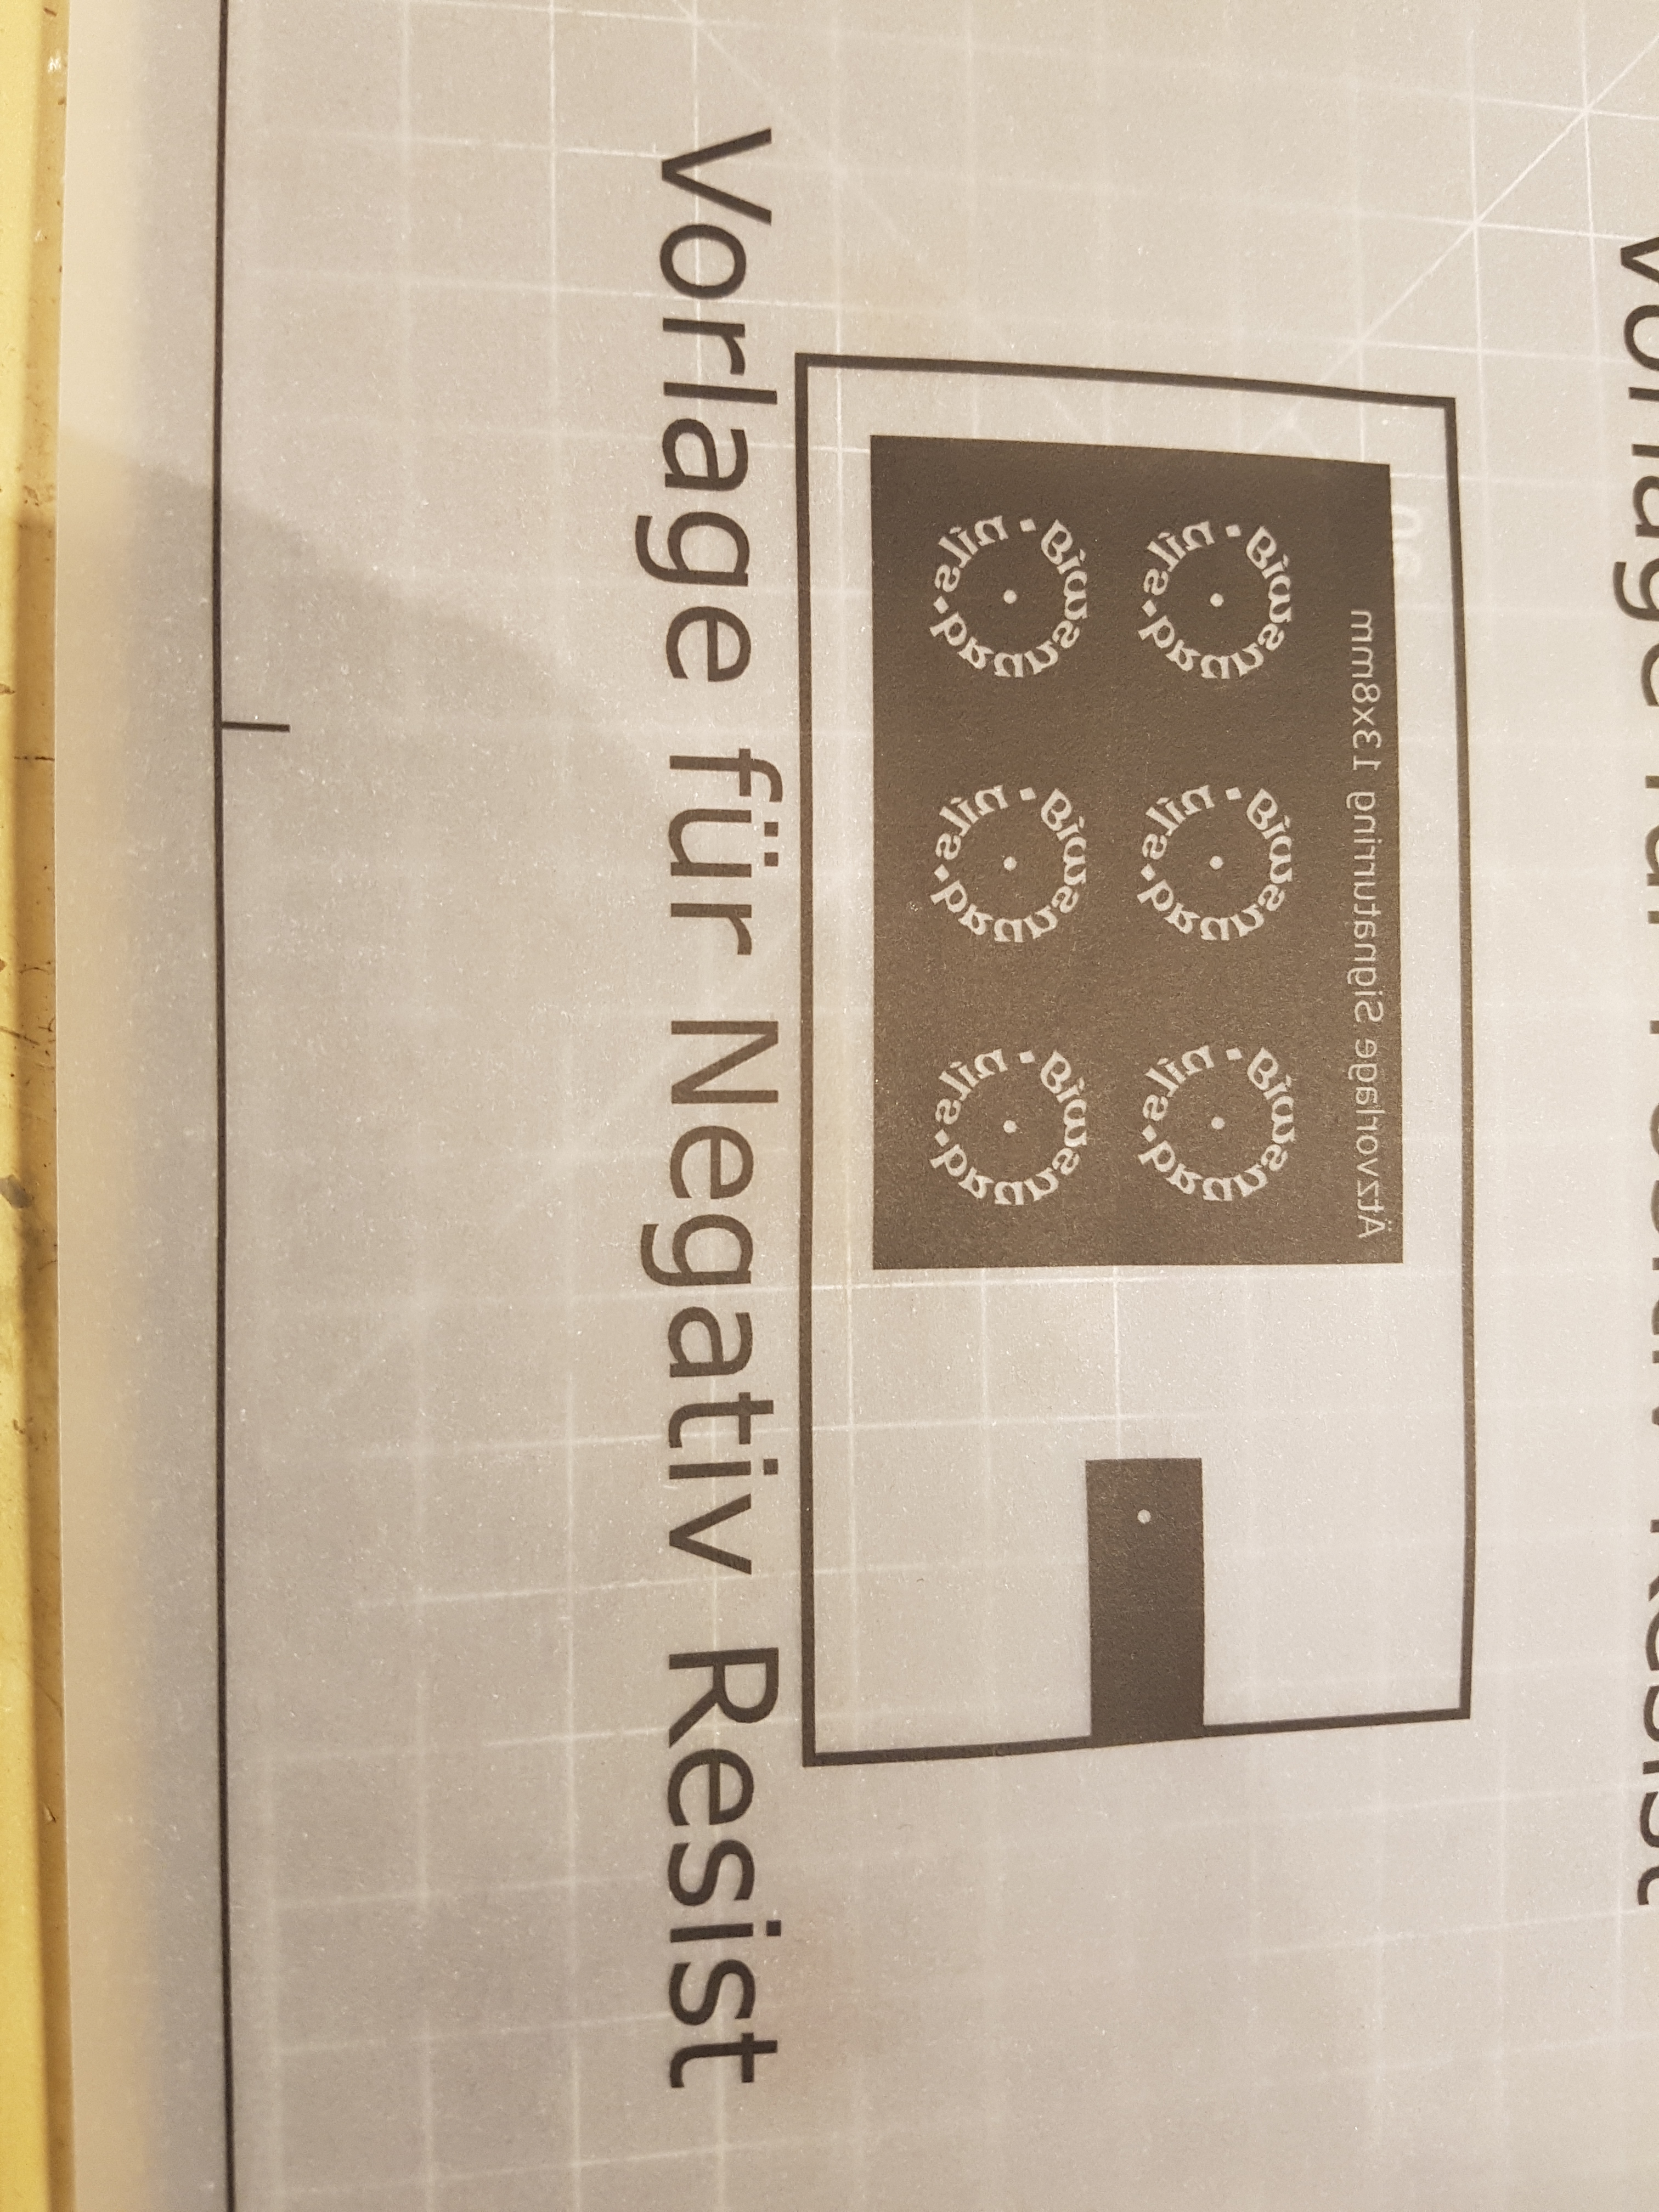
Template for photo resist
The used paper is a semi-transparent one and I used an inkjet printer.
Next step is to illuminate the photoresist. I already prepared the brassplate by polishing it with 240 grid and dregreasing it.
The photoresist reacts to UV light so it must be protected while handling it. While handling it I work under yellow light and later the illumination I do with an UV light used for terraria.

Used UV and yellow light bulb
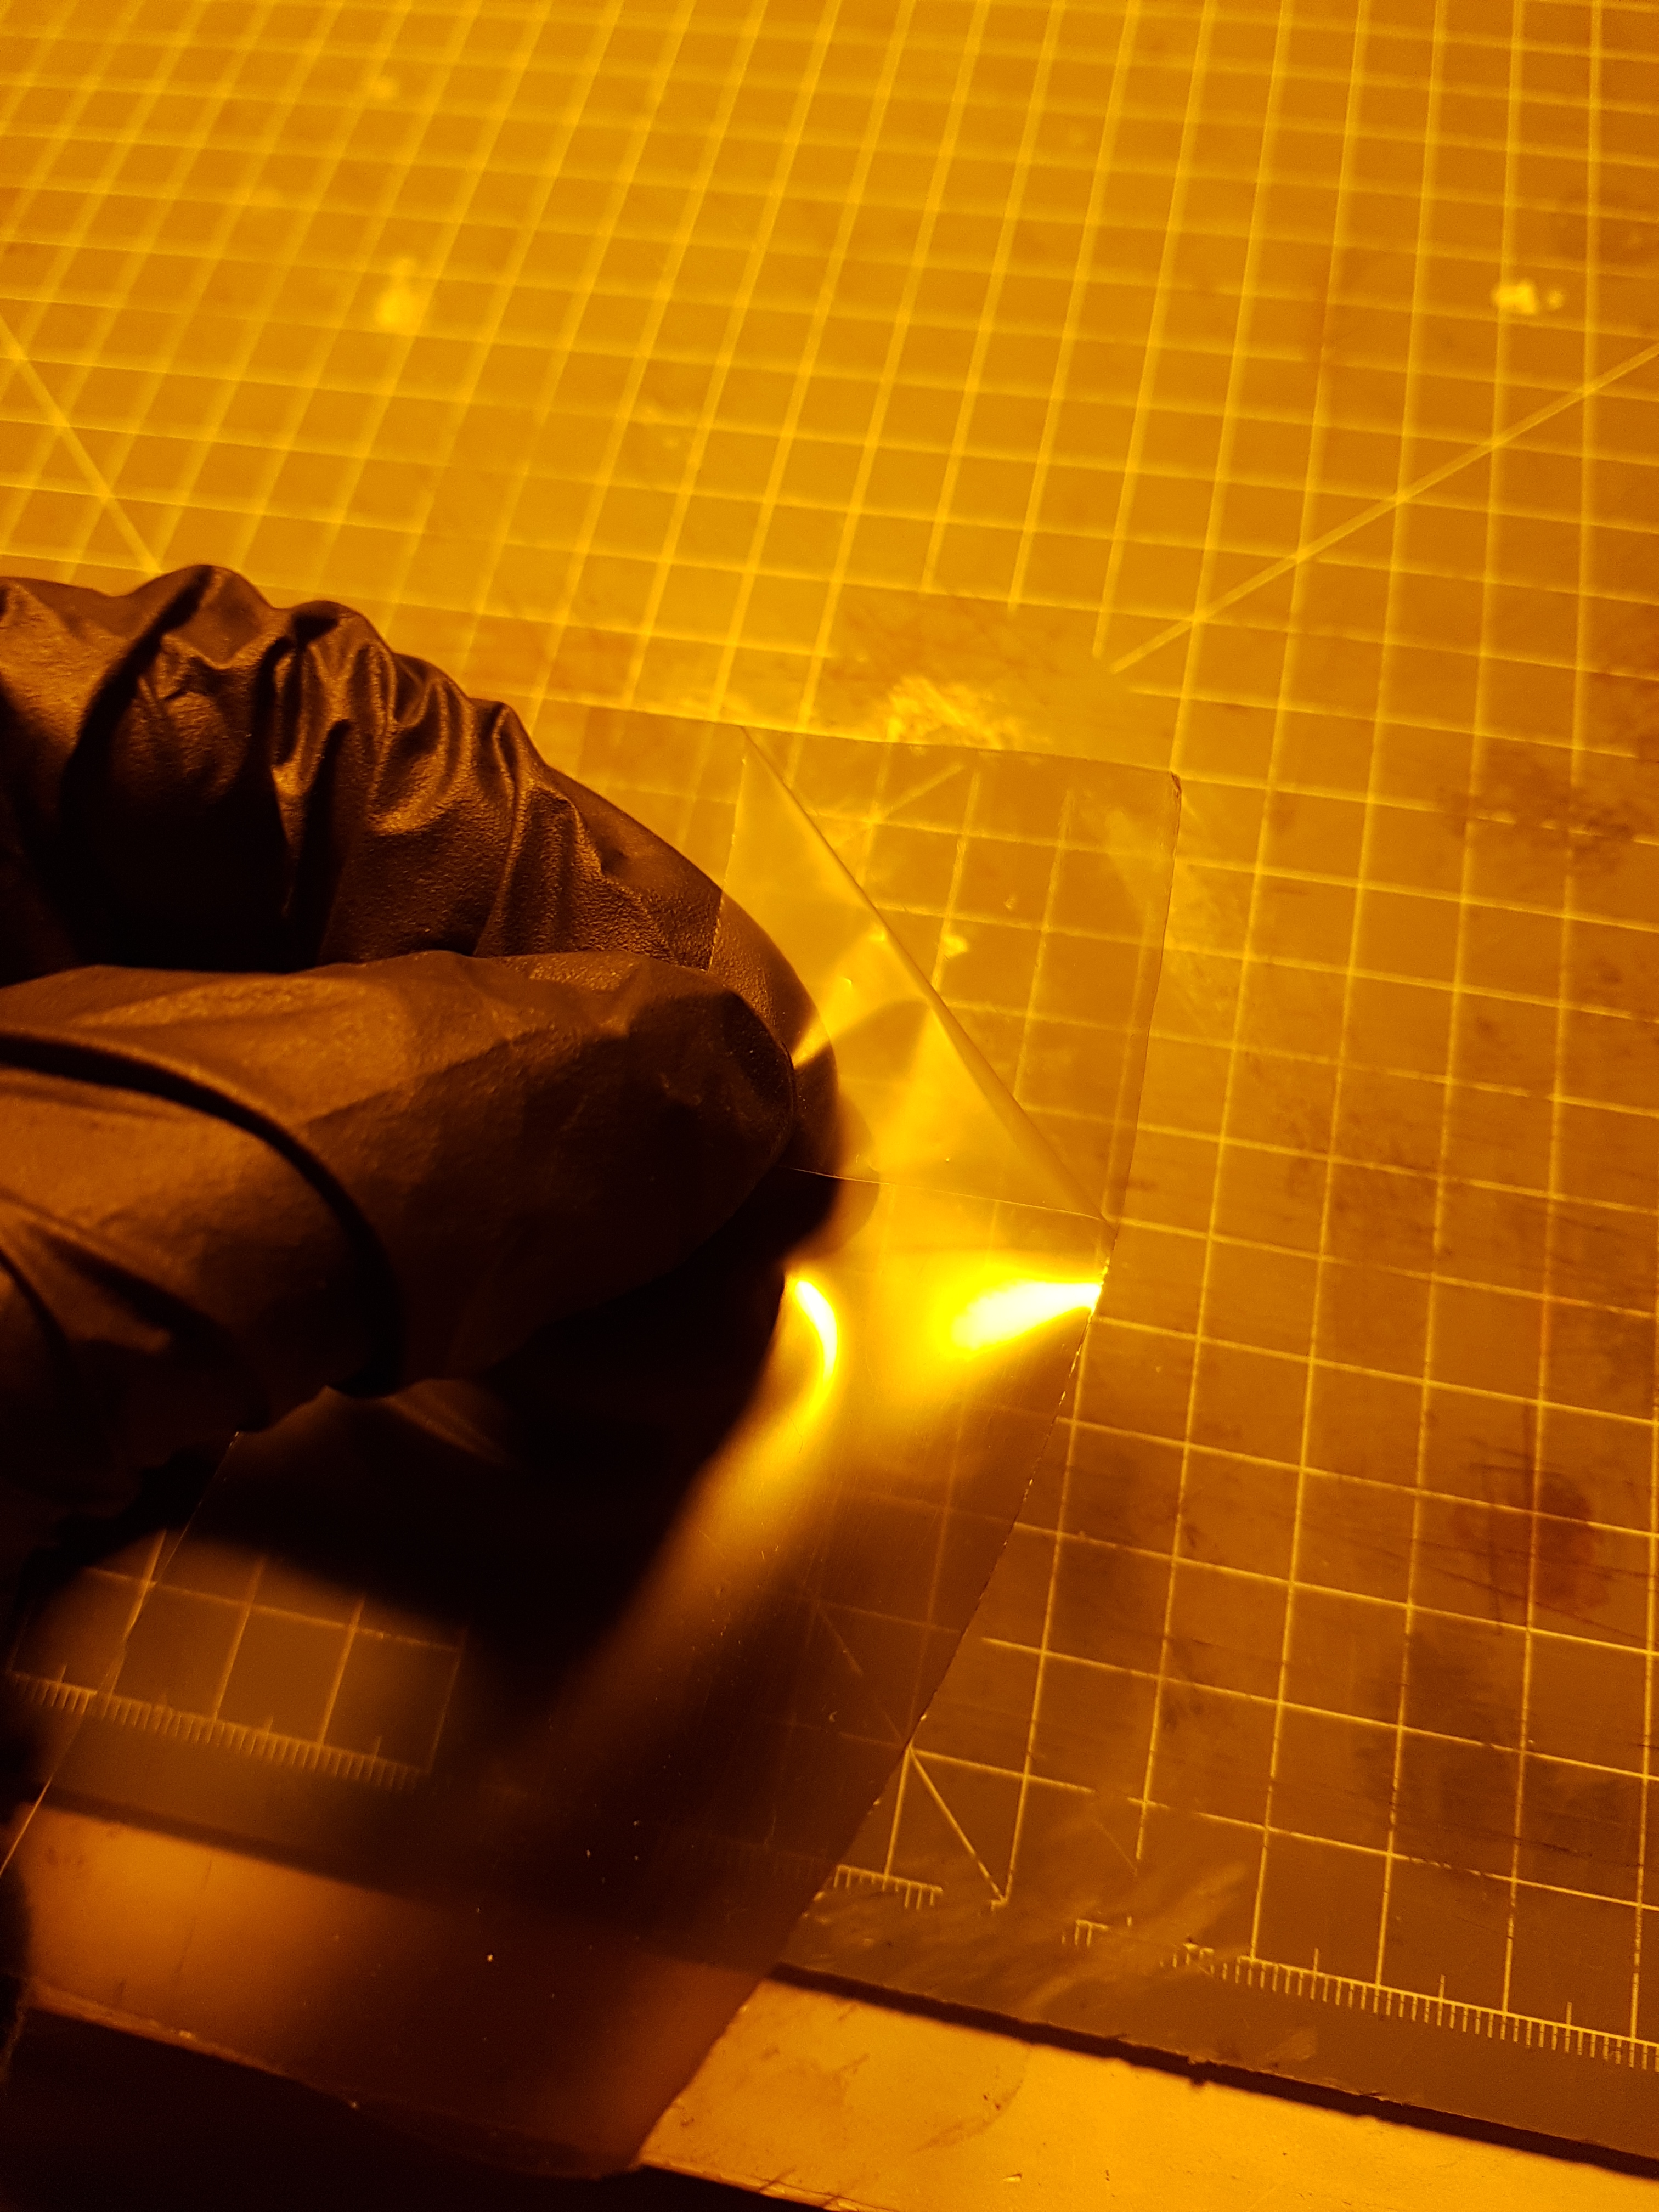
After cutting the photoresist to size (I use a film but you also get photoresist as a paint or spraypaint)….

Cutting the photoresist to size
….I peal of the protective film from one side of the resist.
Peeling of the protective film
Then the photoresist is wetend (purified water), applied to the brassplate and all remaining bubbles and water is pressed out from the middle outwards with a cloth rapped around the finger.
Wetening the photoresist
To strengthen the bound I put the brassplate with the attached resist between papers and iron it on lowest heat.

Protecting and ….

…ironing the photoresist
For the illumination the template is cut out and pressed on the brassplate between a pictureframe. The template is then iluminated with the UV light for 20 minutes.

Cut out template

Illumination with UV light
After the ilumination the difference in the photoresist is already visible. The second layor of protective film is peeled of and the plate is put into a developer. According manuel the process should take about 5 minutes but I needed about 15 Minutes till all not iluminated resistance was dissolved.

Photo-resist in developer
Now the plate is nearly ready for etching.

Etching
for the electro etching I will use an power adapter with a max power of 12V. The etch runs by round about 0,2 A to get a smooth etch ground.
In addition I need a container for the saltwater, a holder for the electrodes (drinking straw with rapped around cables) and a sacrifical piece of brass. The saltwater consist of water with enough salt that no more salt will dissolve.

Needed equipment for the electro etch
The etch piece and the sacrifical brass are put on the electrodes while the power supply is switched off. The piece to be etched must be put on the positiv side.
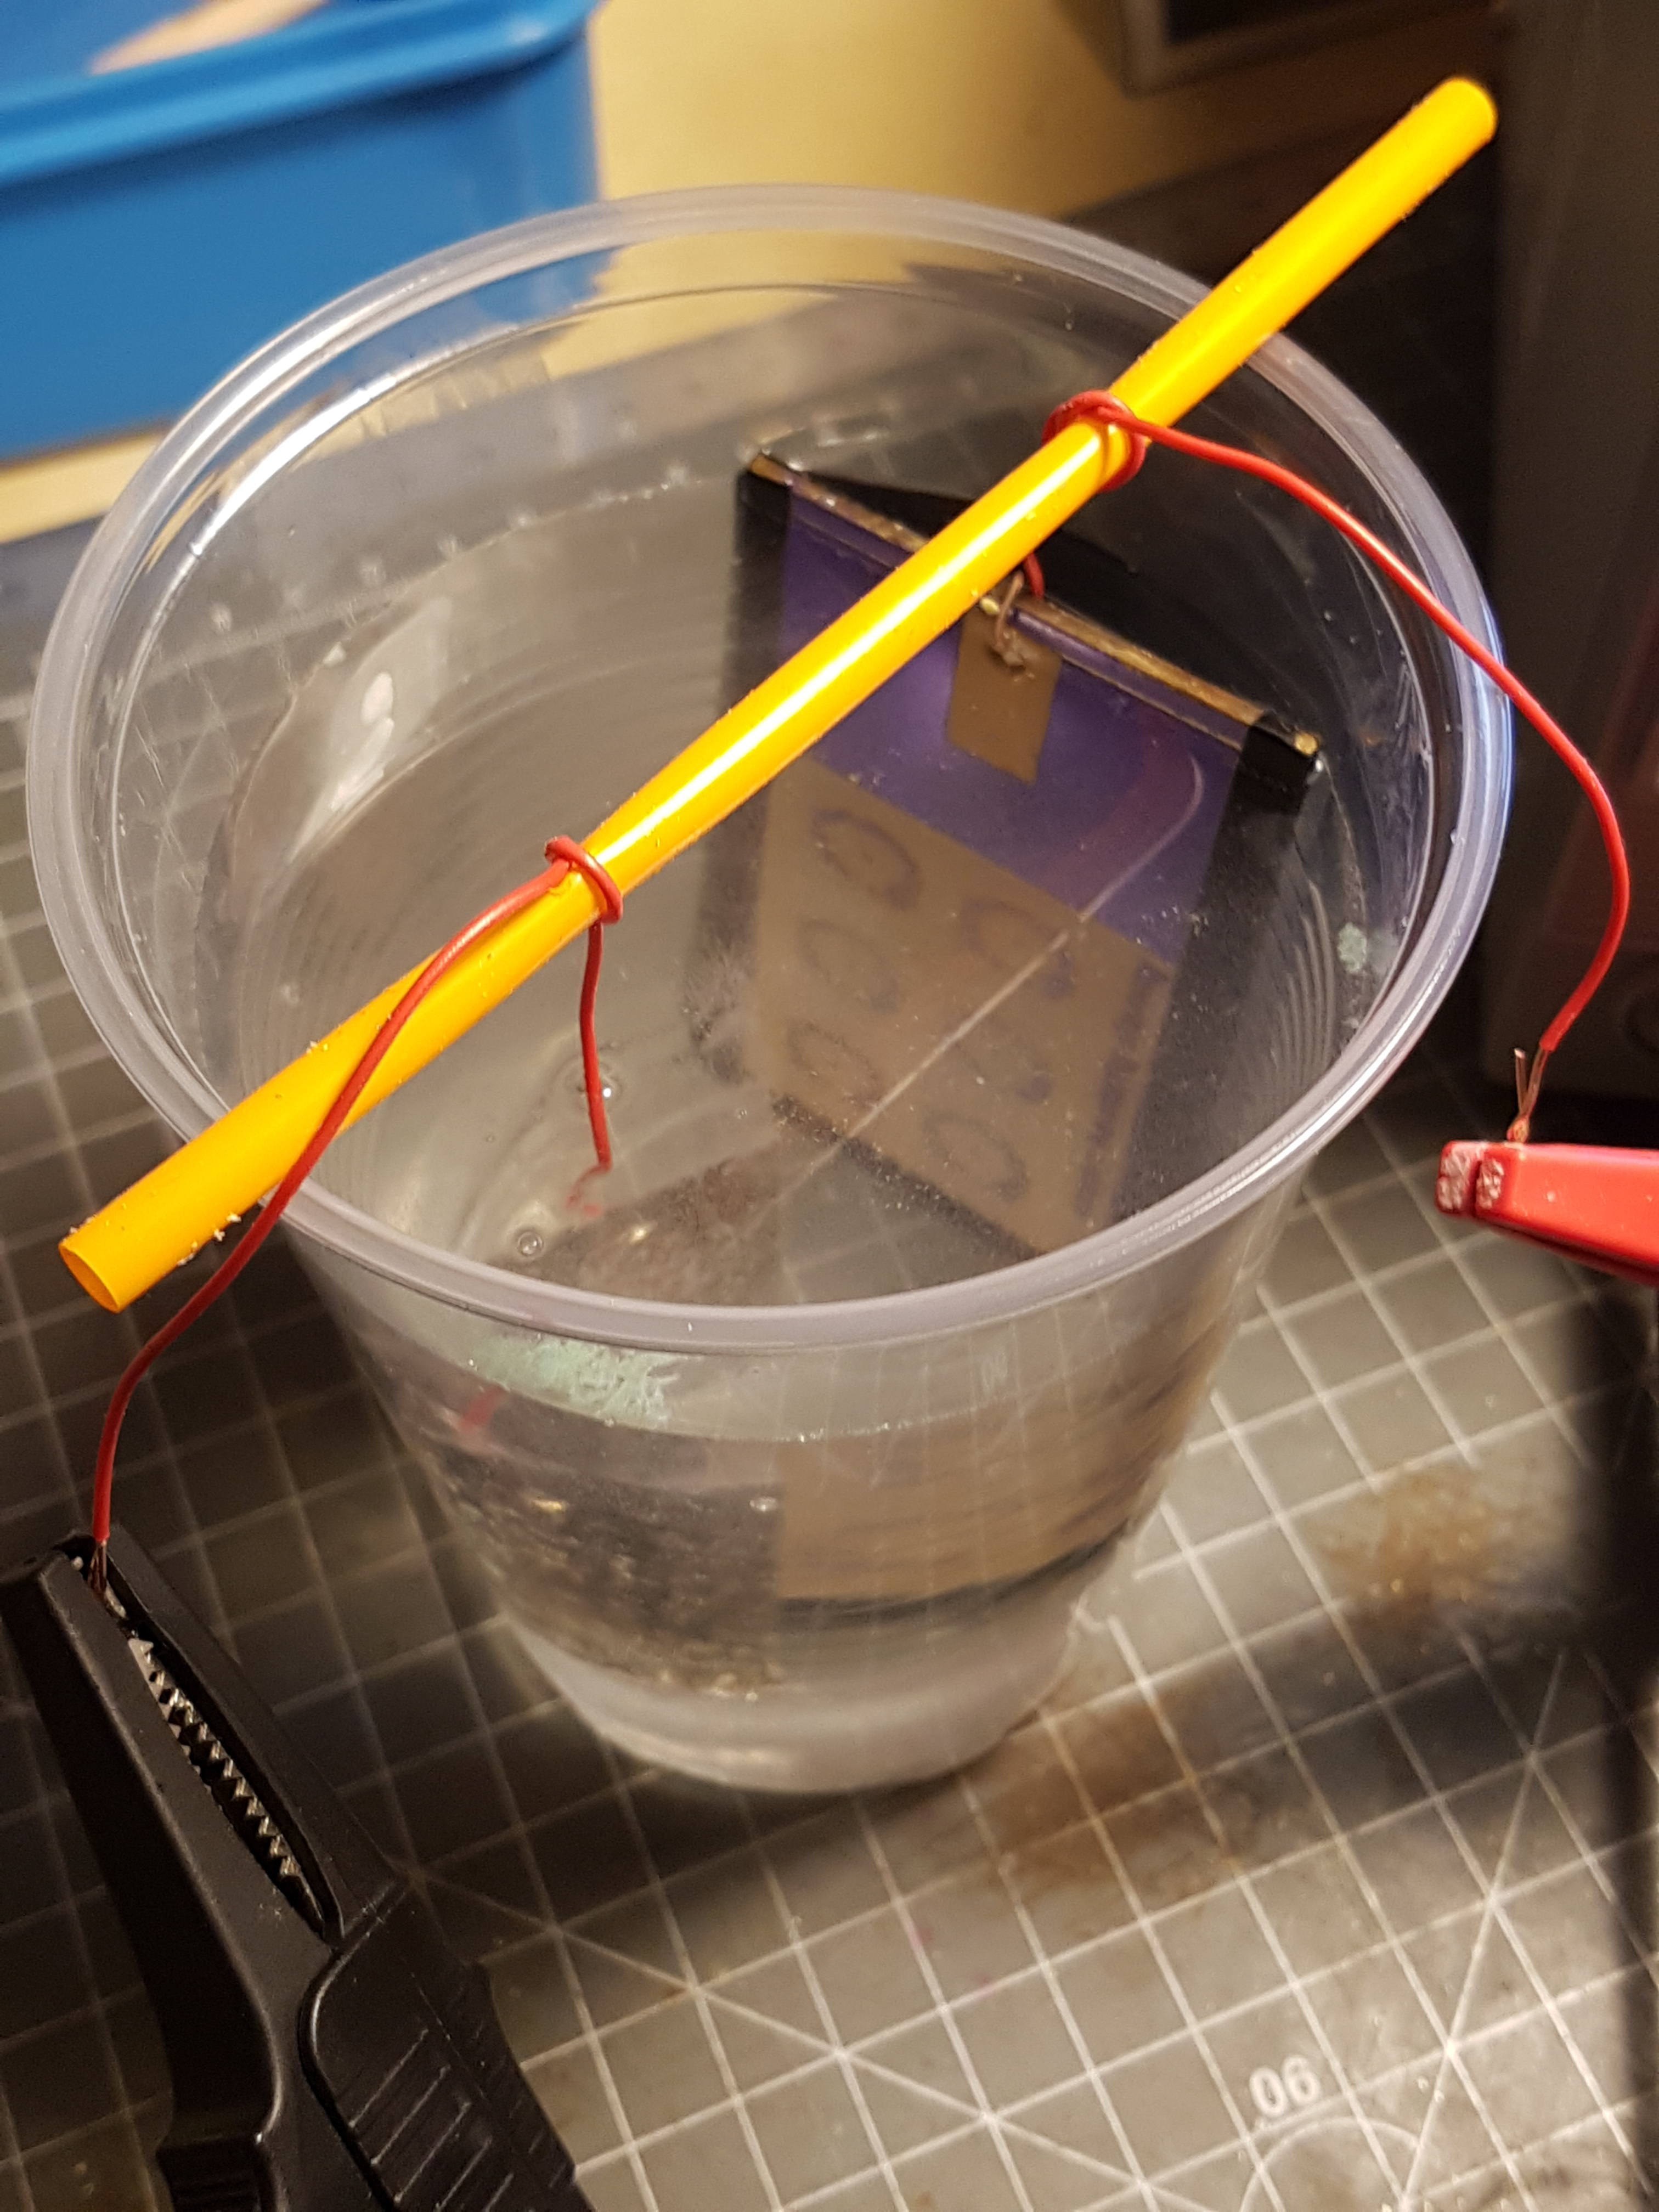
Ready for the etch
To start the voltage is adjusted till the Amperes reach 0,2A. The water round the sacrical brass should start to bubble (attention this is hydrogen and can reach to an explosive mixture when not done by good ventilation).
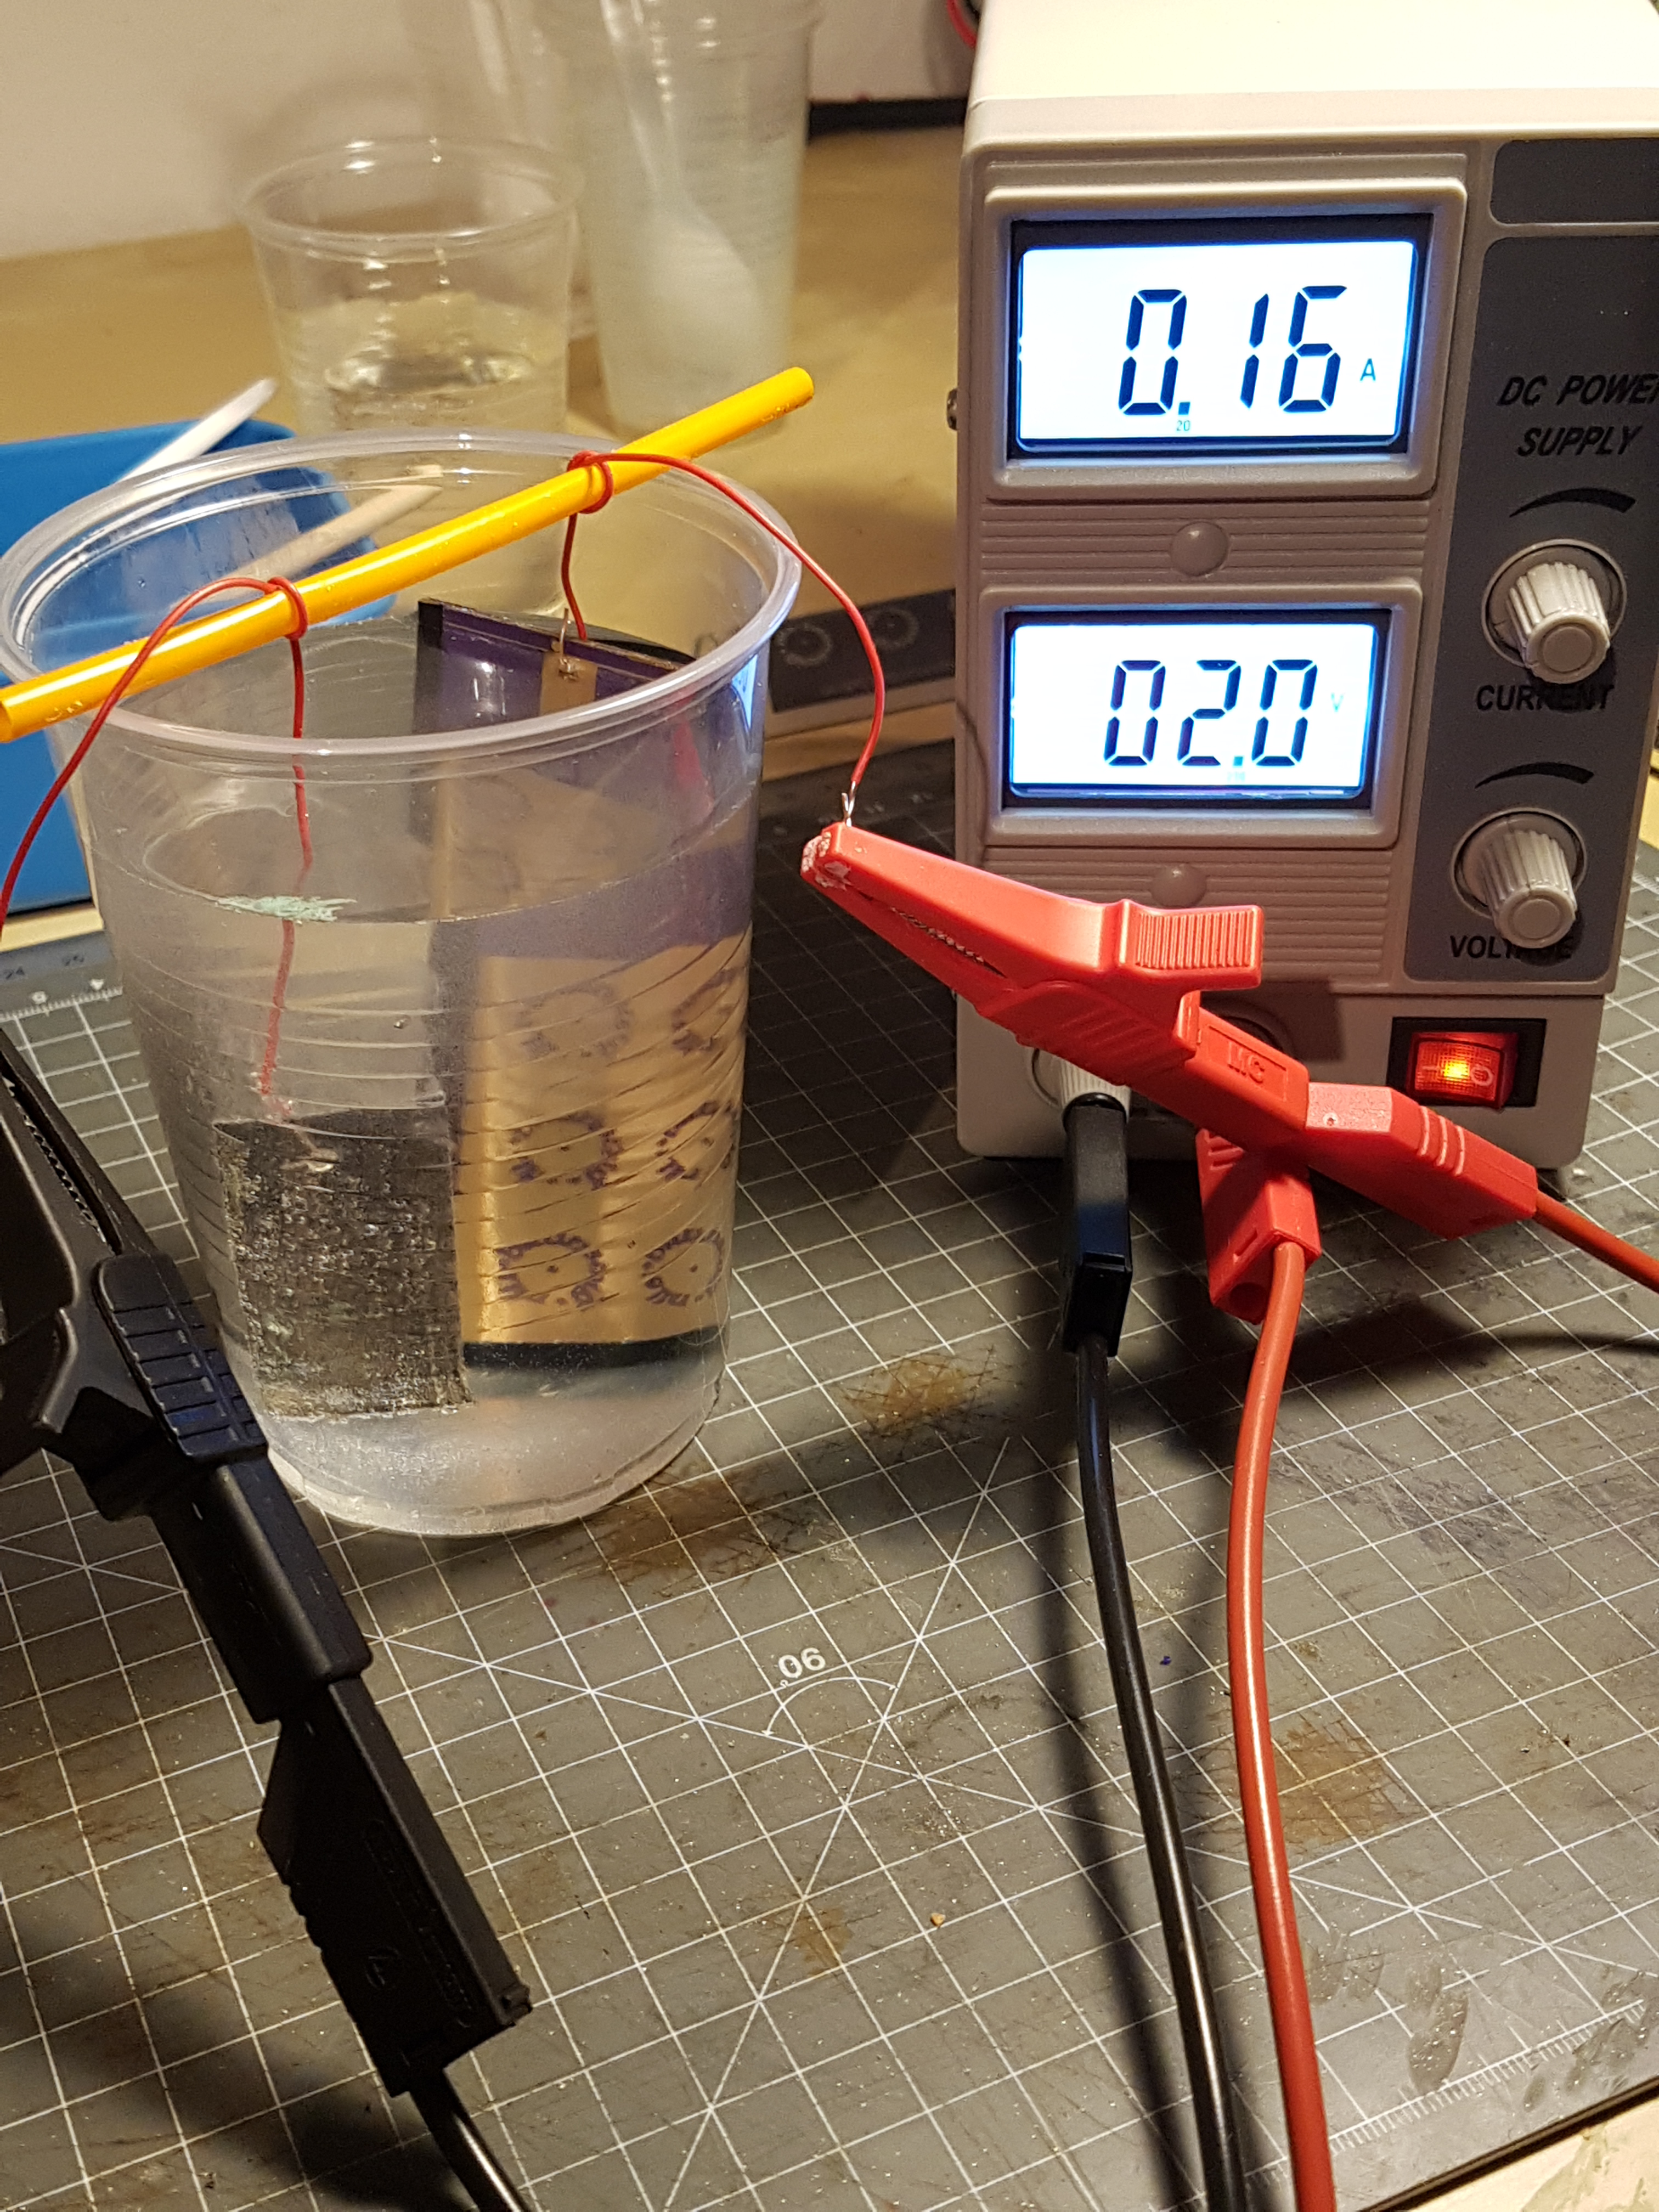
Running etch
While etching I had to clean the etch piece from time to time cause the currency dropped due to a layer of dirt.
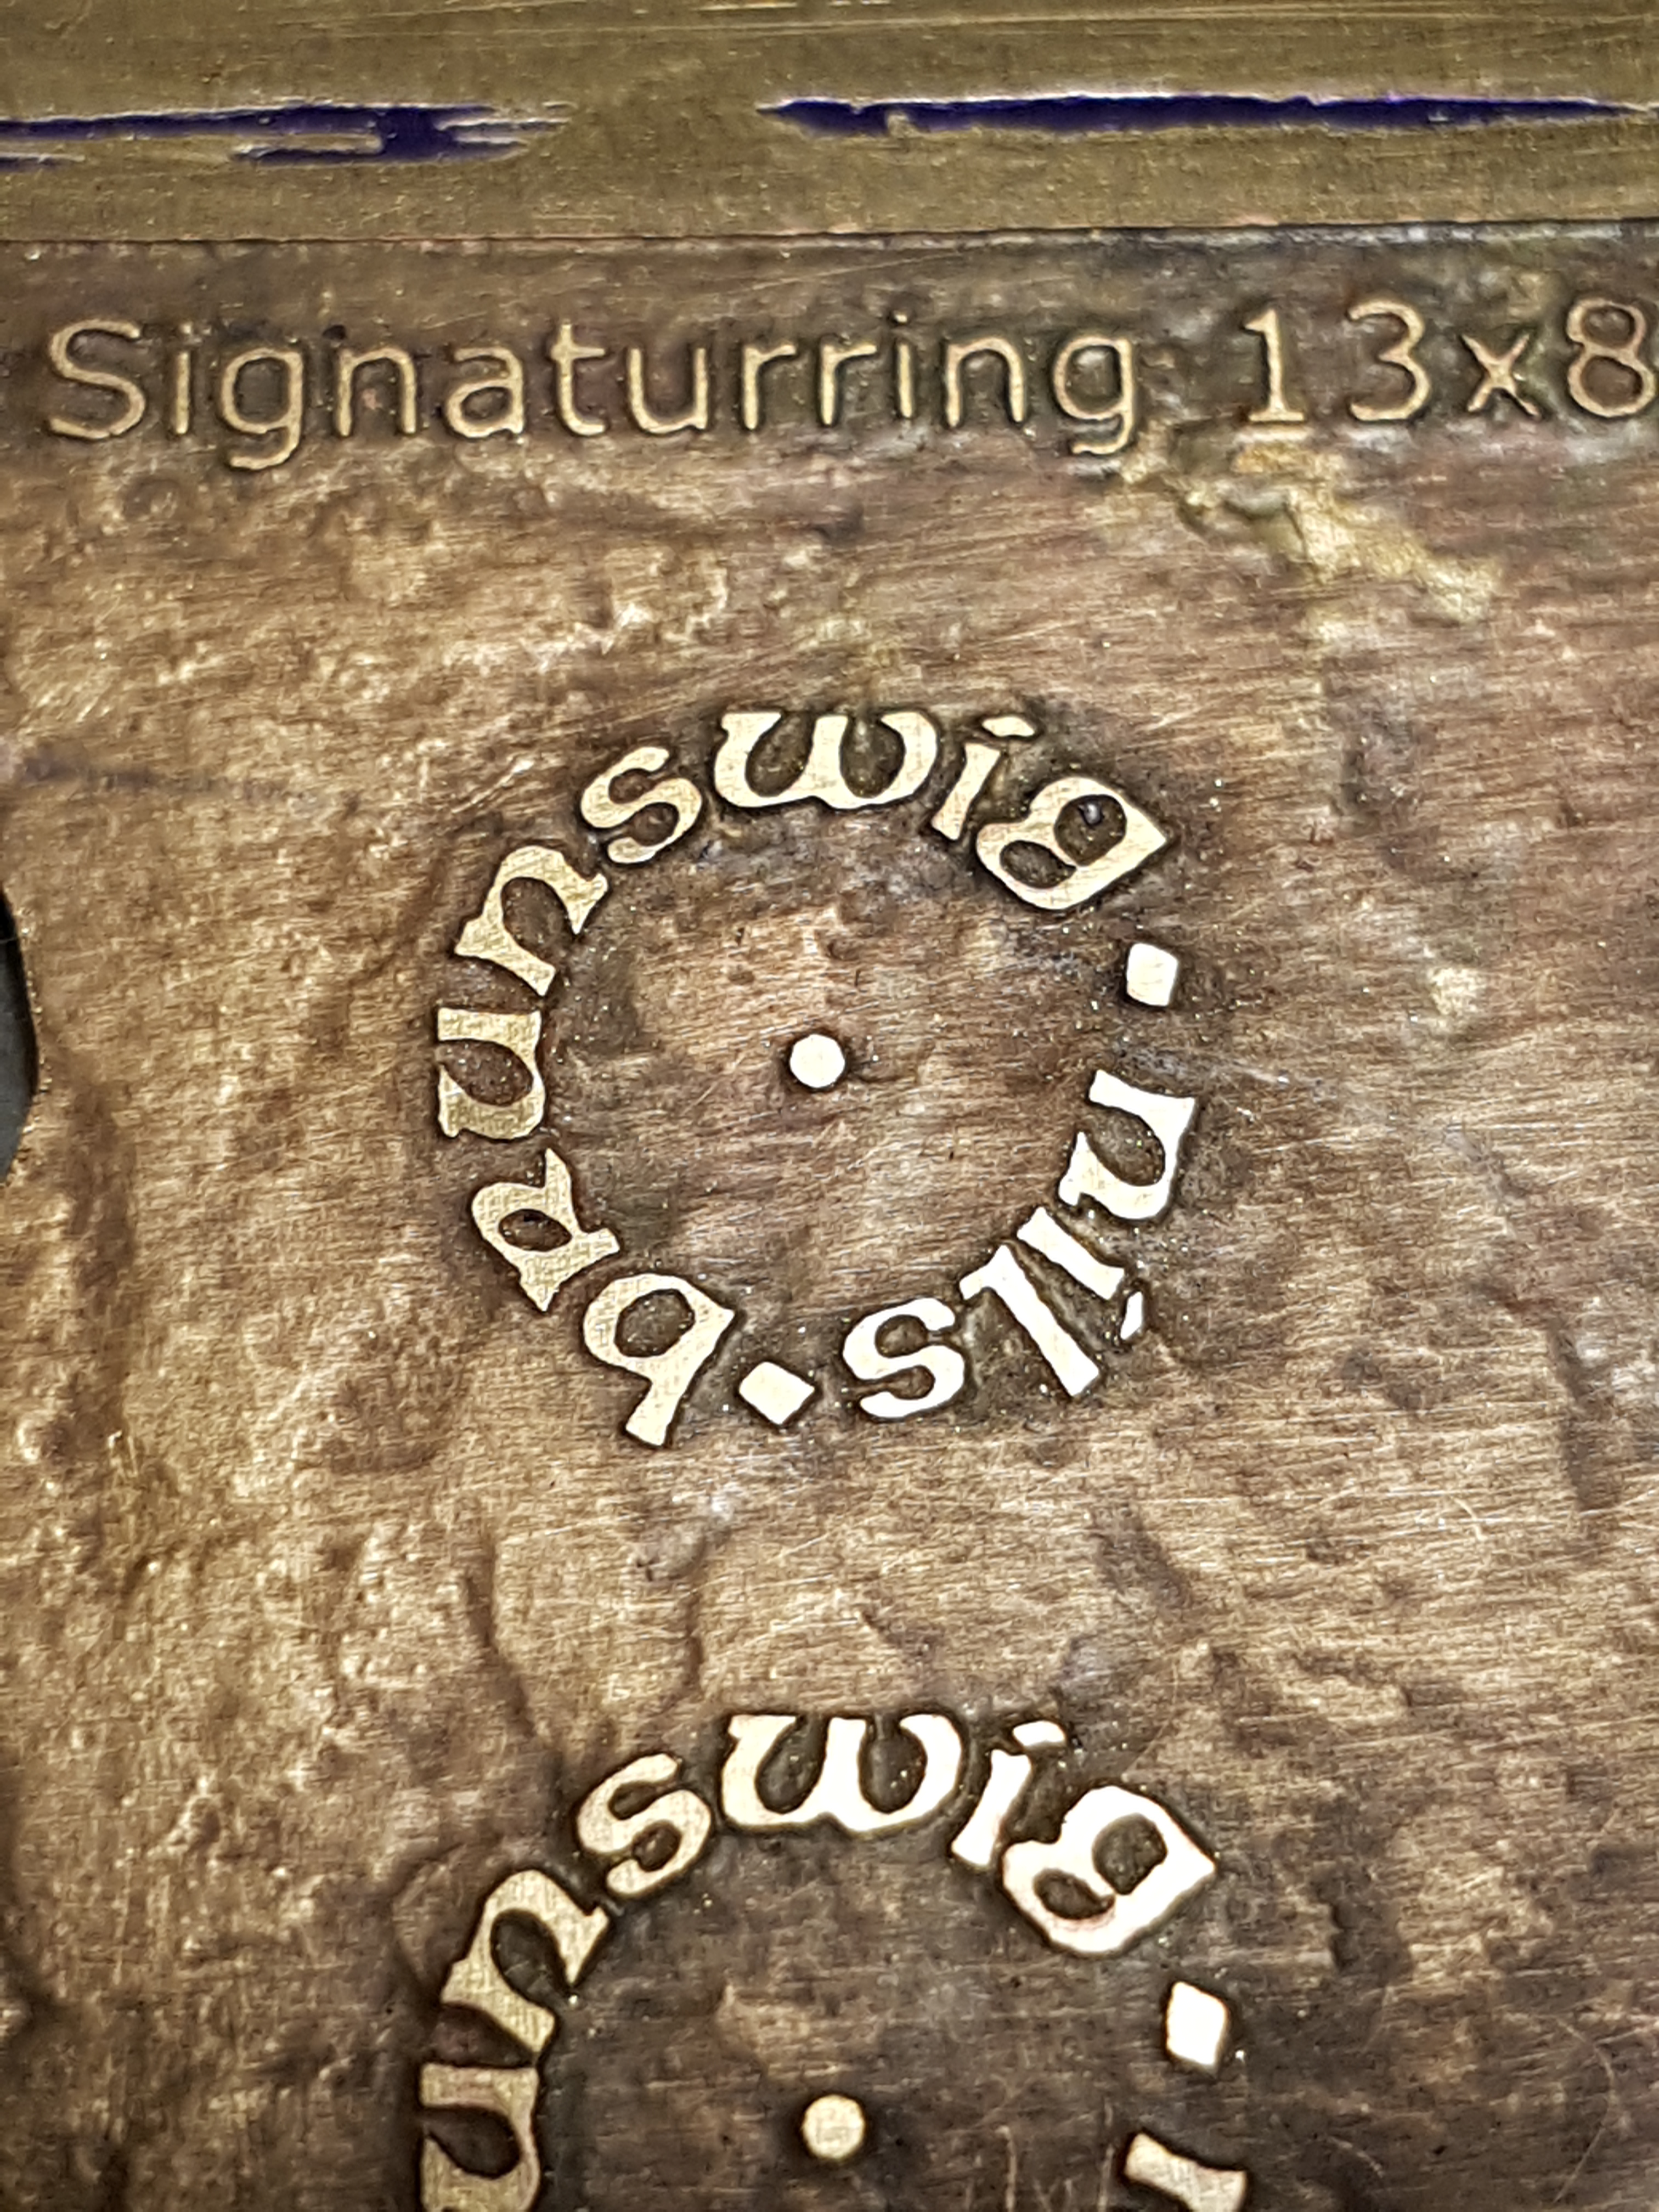
Etch finished
Finishing the ring
The plan is to saw out the rings with a goldsmith saw. First I centerpunch and mark the inner and outer diameter of the rings with a compass. Then I drill in 2mm holes, one in the inside and one on the outside of the rings.

Prepared for cut out
Then I cut out the rings I need.
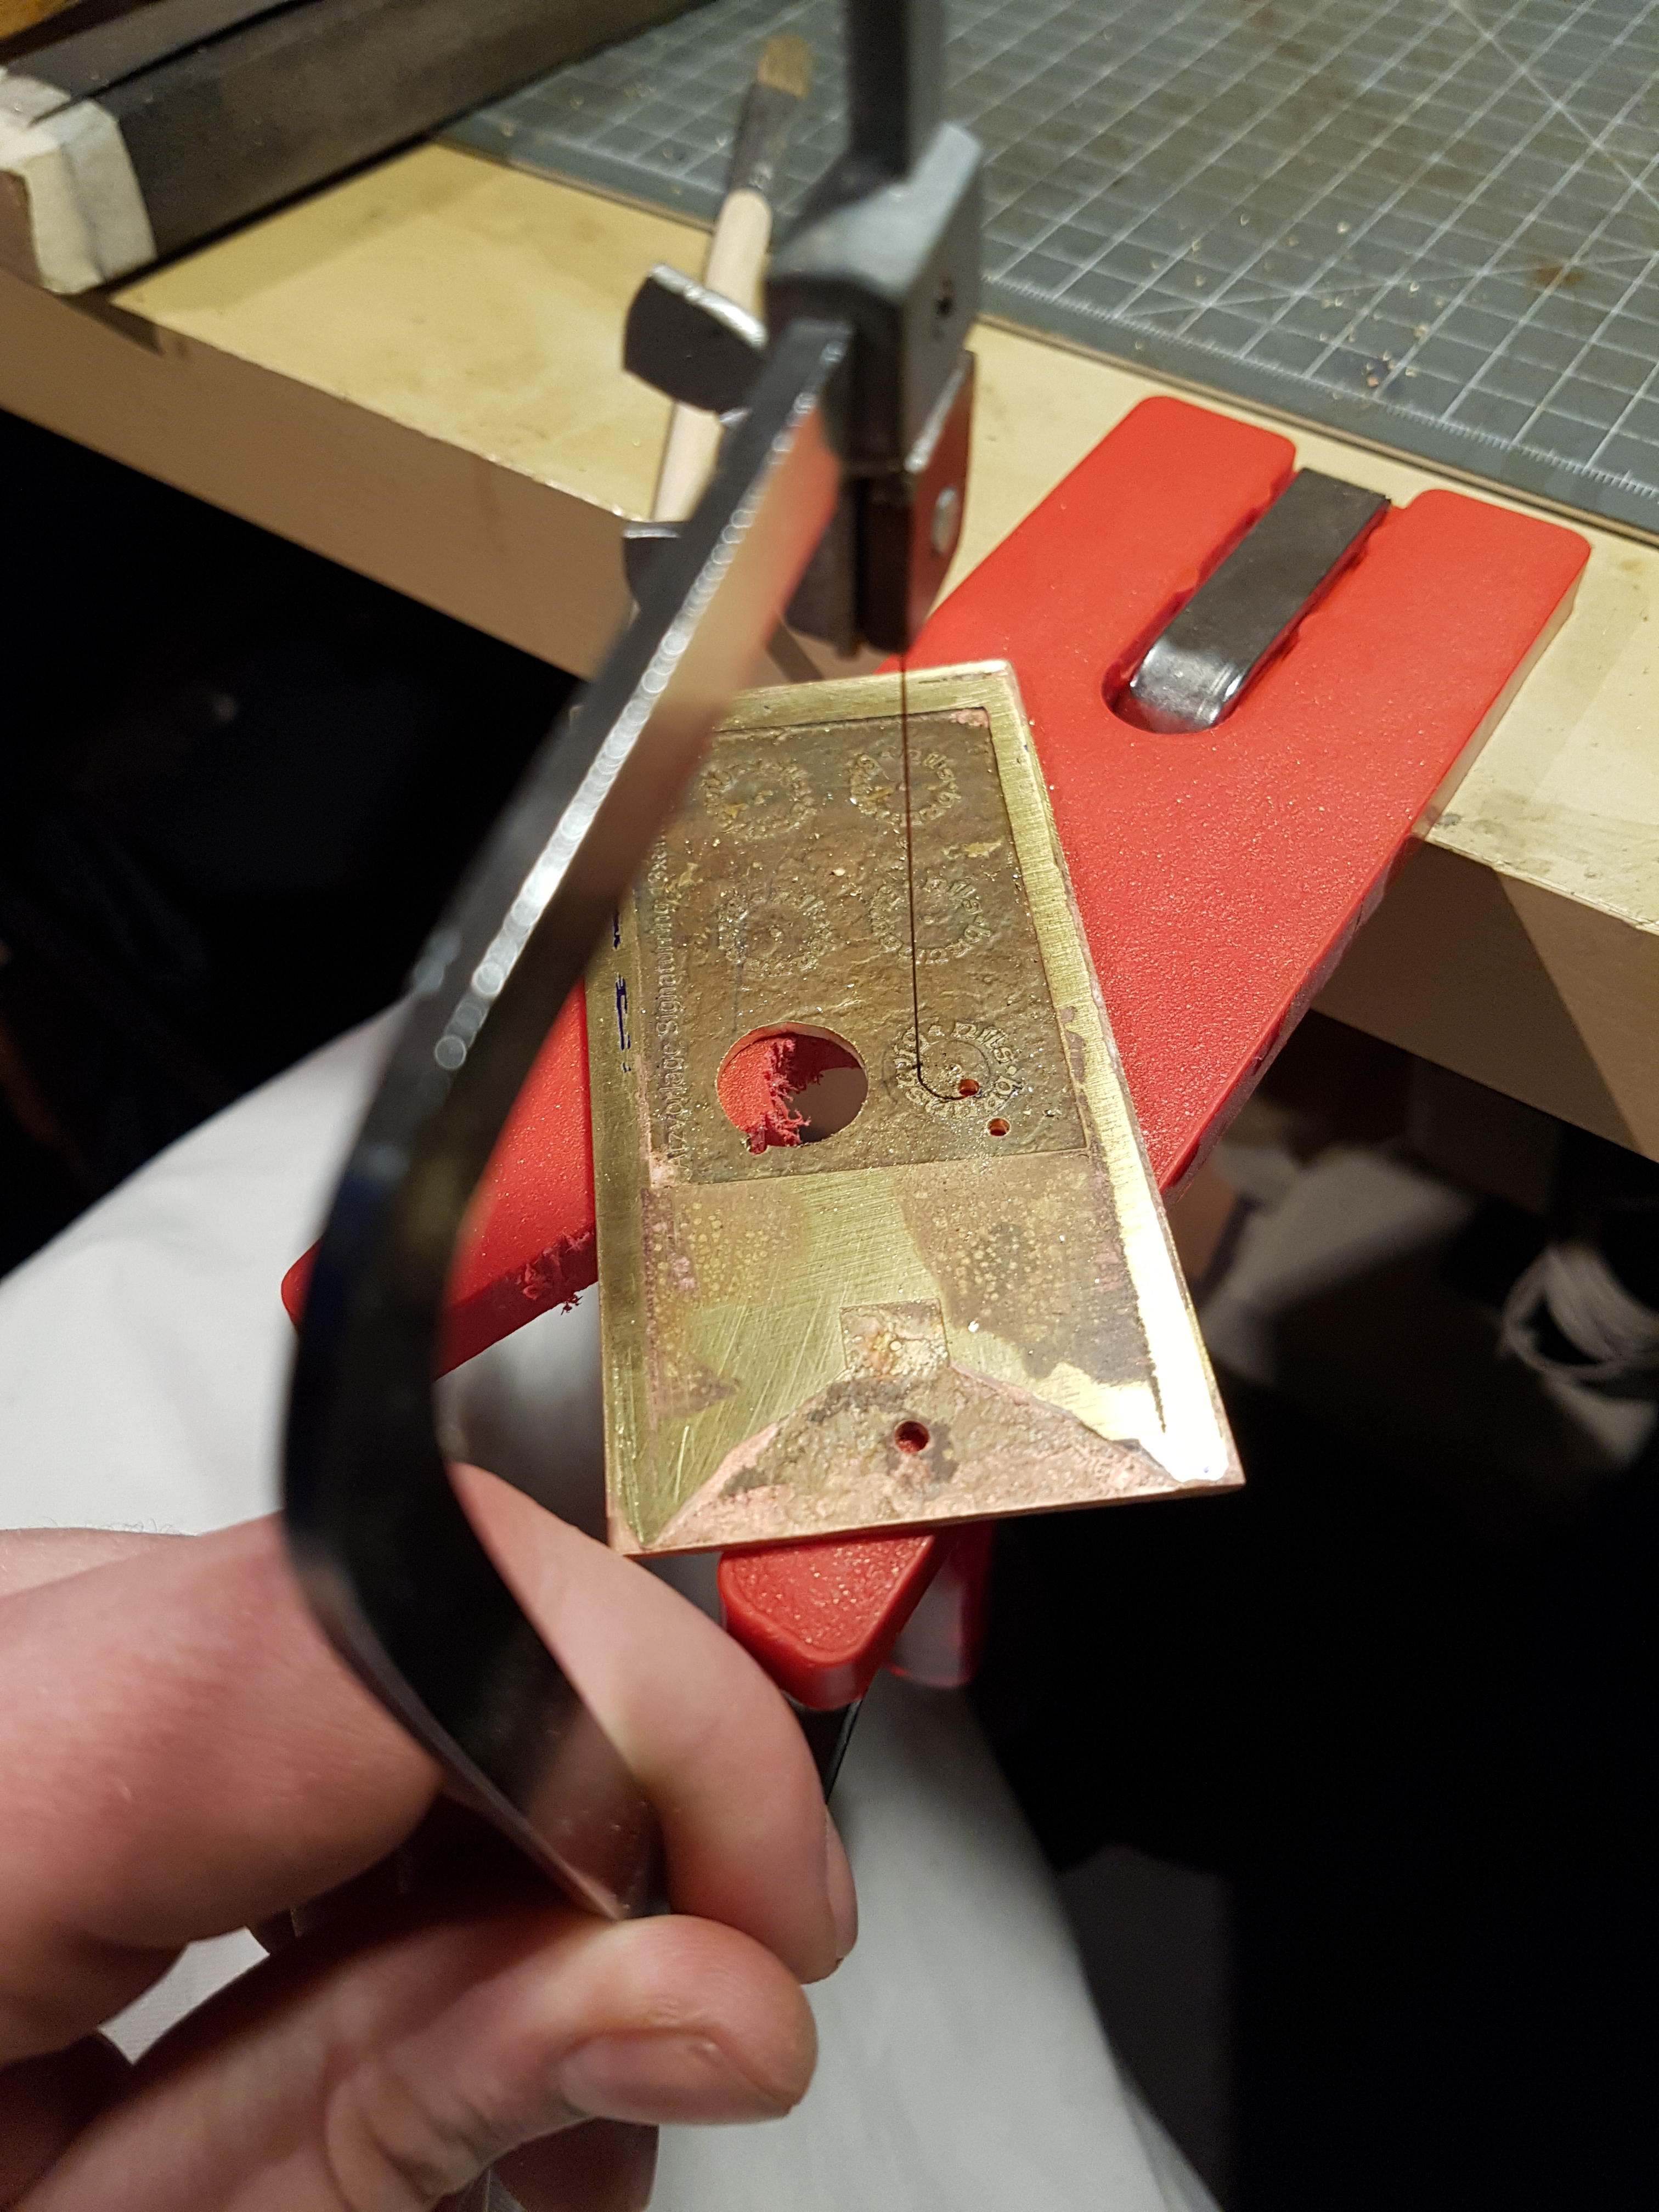
Sawing out a ring
The cut out rings need just a quick path with a key file.
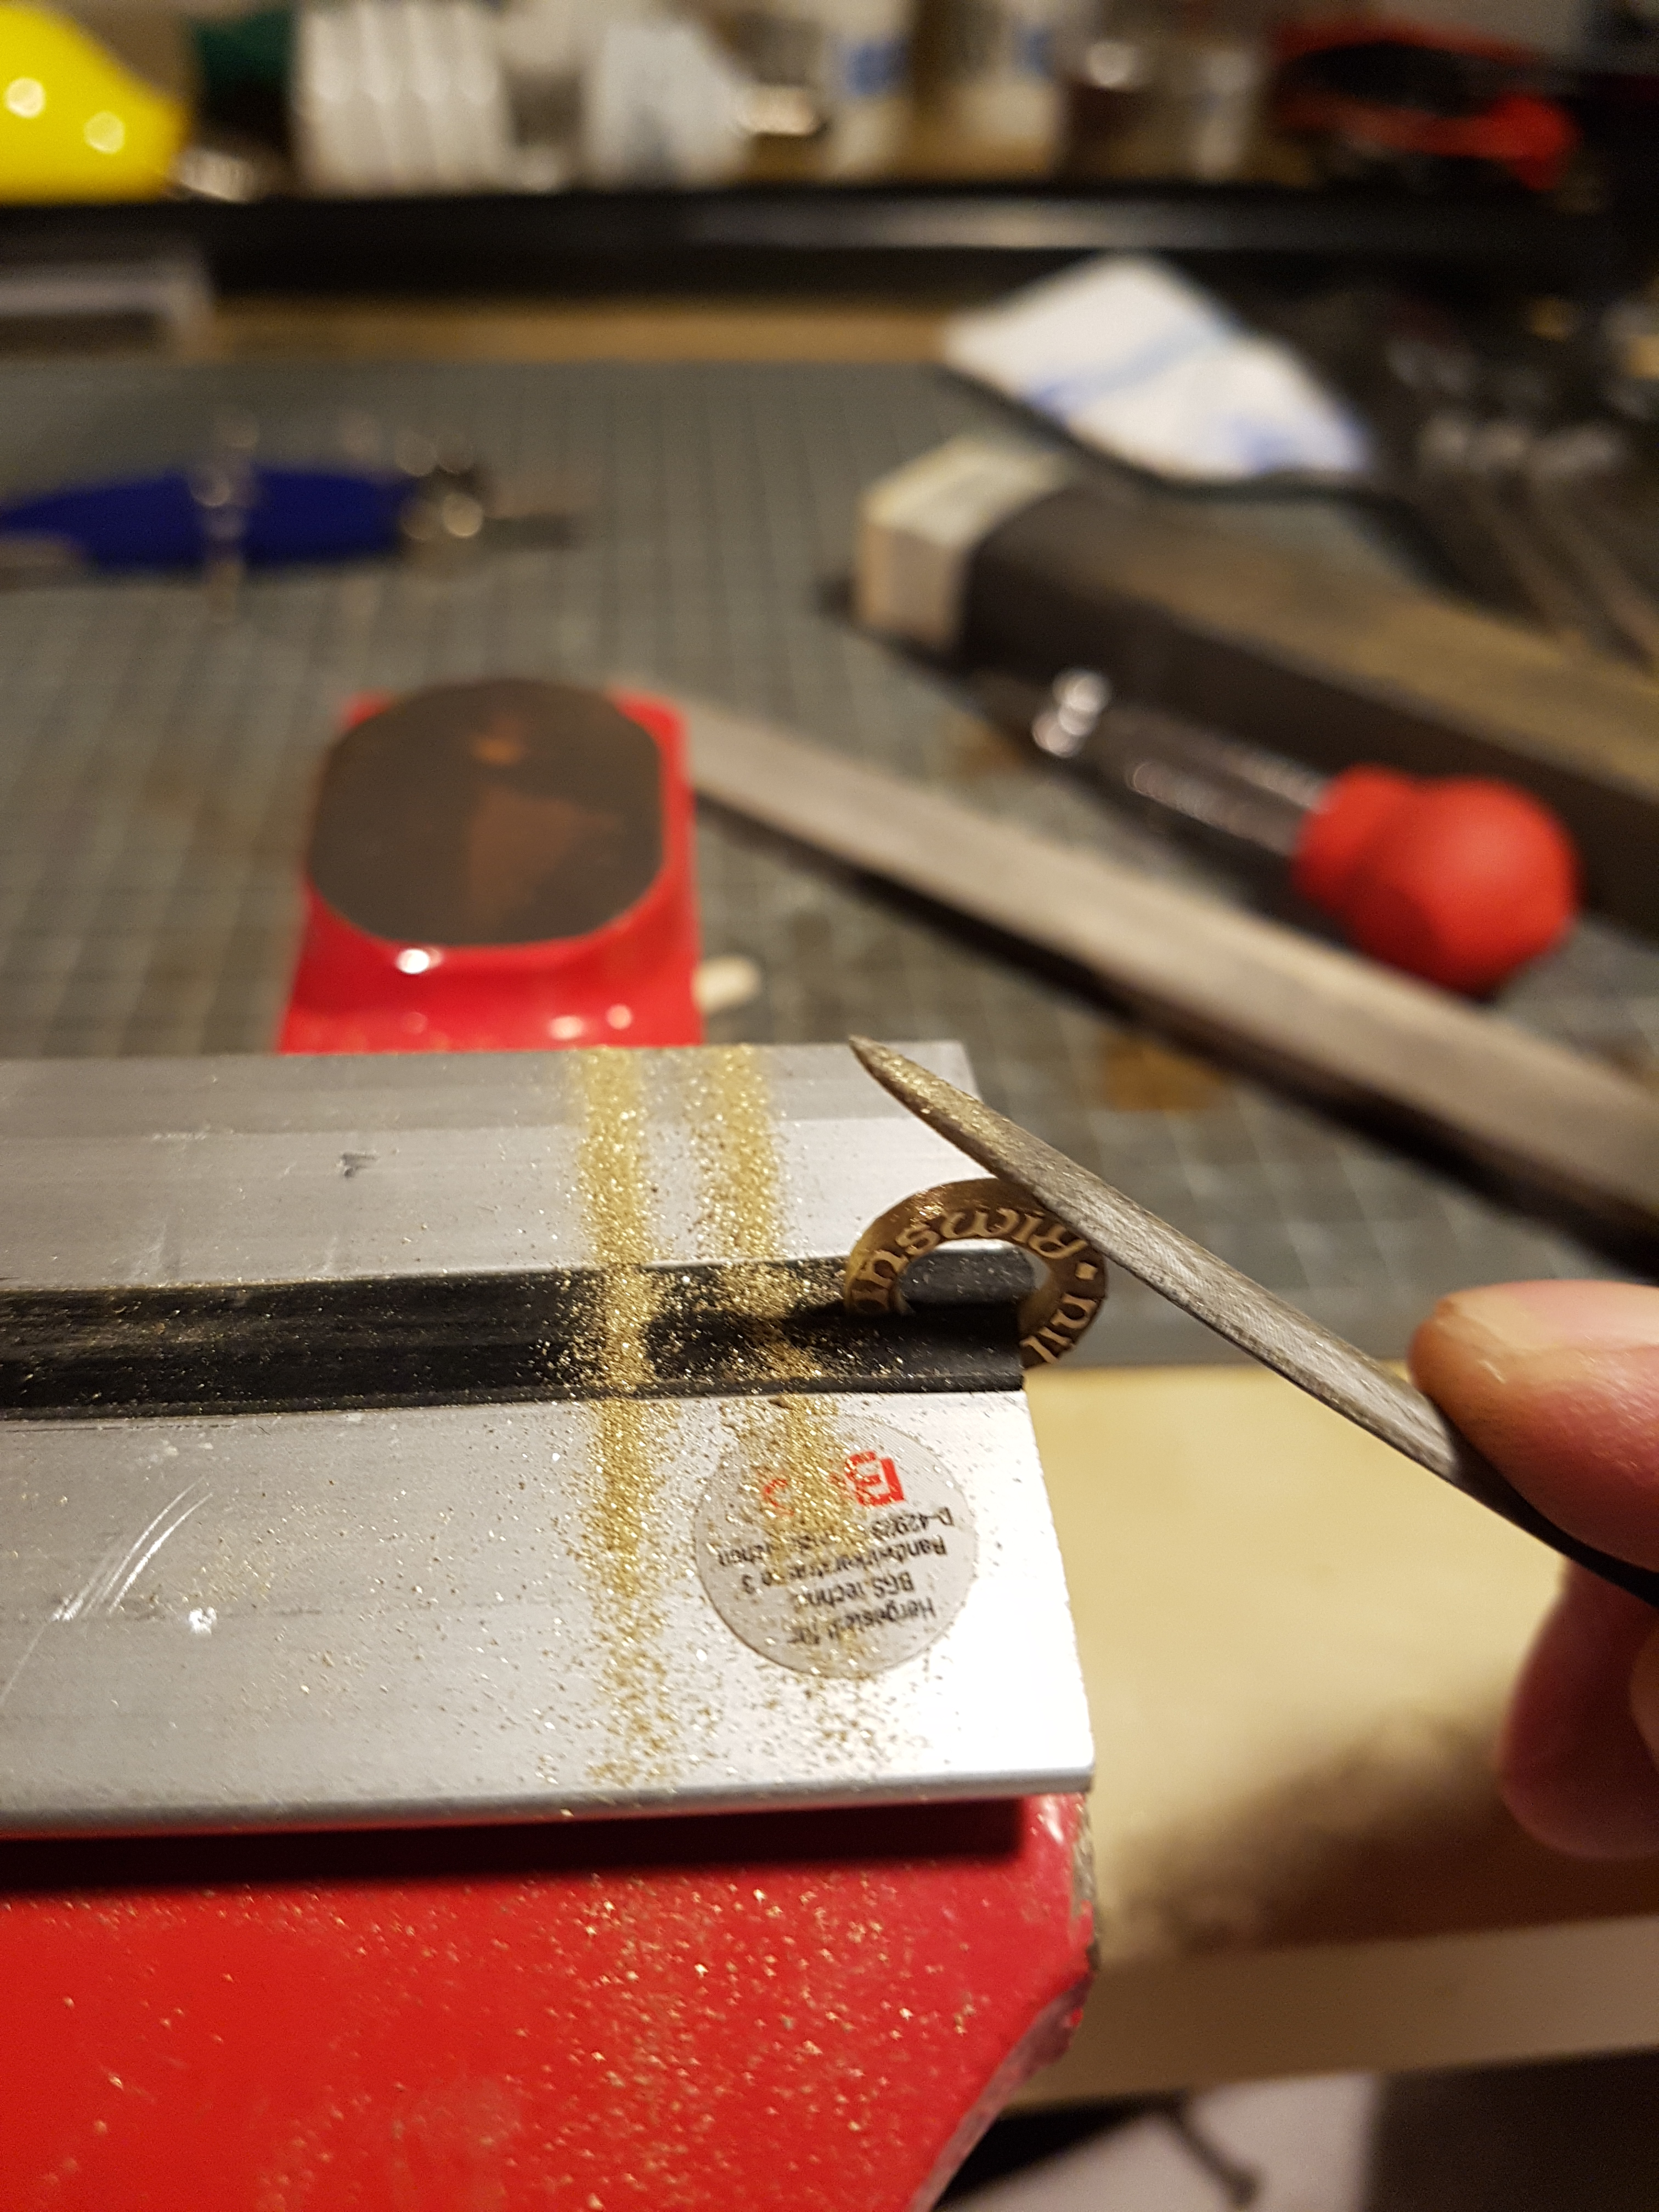
Filling the rings
I polish the rings with a stainless wirebrush on a dremeltool.

polishing the ring
And the ring is ready to be assembled

finished ring

Großer Aufwand, tolles Ergebnis.
Danke für die Blumen. Will die Technik noch weiter ausprobieren.
Hi Nils, hast du mal wieder ein neues Plattnerprojekt o.ä. gestartet? Fands immer ganz cool, da du der einzige deutsche Blog zum Thema warst!
Hi, vielen Dank. Ja ich habe einige Projekte begonnen. Aber leider komme ich neben der Arbeit gerade einfach nicht dazu.
Hallo! Welches sind denn die wichtigsten “Stakes” (ich kenne den deutschen Begriff dafür nicht) für einen anfangenden Plattner? Also welche soll ich als erstes beschaffen bzw. selbst schmieden
Hi, zum Formen nutze ich zumeist nur zwei Stakes:
1) T-Stake Amboss (Sperrhaken Amboss) mit einem Rundhorn und einem Vierkanthorn. Den nutze ich zum biegen (Rundhorn) und für das raisen auf der Spitze des Vierkanthornes.
2) Ball-Stake zum Formen und Glätten tiefer Formen wie bei Helmen.
Zum Verzieren mit Graten, Kanneluren und gerollten Kanten ist dann noch ein Bördeleisen nützlich.
Viel Freude damit
Danke! Wie heißen die “Stakes” denn im Deutschen? VG
Moin! Im Deutschen leider nicht so eindeutig.
Es gibt:
1) ….-Eisen wie z.B. Bördeleisen
2) ….-Stock wie z.B. Sickenstock
3) Sperrhaken überschneidet sich manchmal mit ….-Stock
4) Spezifische Namen wie Faust
Gruß